
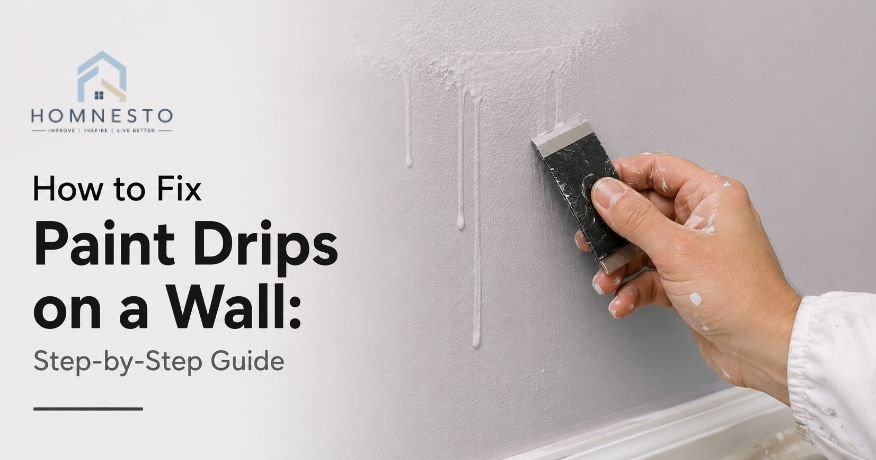

A paint drip can ruin the look of an otherwise smooth wall. You may notice a small raised bead, a long vertical line, or a thick spot where too much paint collected. These marks are especially easy to see when sunlight or a lamp hits the wall from the side.
The good news is that a paint drip usually does not mean you need to repaint the entire room. The right repair depends on whether the paint is still wet, partly dry, or fully hardened. Wet paint can often be corrected with a few careful strokes. A dried drip usually needs to be leveled before new paint is applied.
If you are learning how to fix paint drips on wall surfaces, the main rule is simple: do not try to hide a raised drip with more paint. First, make the surface level, then restore the paint finish.
This guide explains how to repair small drips, long runs, dried paint buildup, and fresh mistakes. You will also learn which tools to use, when sanding is necessary, how to blend a touch-up, and how to prevent the same problem during your next painting project.
What Causes Paint Drips and Runs on a Wall?
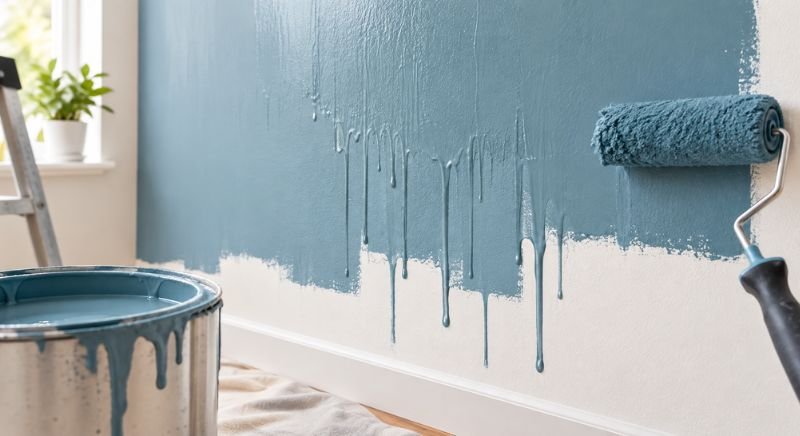
Paint drips happen when more wet paint collects in one place than the wall can hold evenly. Gravity then pulls the excess paint downward. A small amount may create a rounded drop, while a larger amount can form a long vertical run.
One of the most common causes is too much paint on a brush or roller. When a tool is heavily loaded, it can leave a thick layer on the wall. The paint may look fine for a few seconds, then slowly begin moving downward.
Applying a coat that is too thick can cause the same problem. Thick paint takes longer to dry, giving it more time to move before it sets.
The problem is also common around corners, trim, ceilings, windows, and door frames. These areas can collect extra paint because the tool is harder to control. If the excess is not spread out, it can form a paint drip.
Going back over the same wet area too many times can also cause trouble. Each pass moves more paint around the surface. Instead of improving the finish, repeated brushing or rolling can push excess paint into one spot.
Wall condition matters as well. A rough, damaged, or uneven surface can cause paint to collect in small depressions. On textured walls, paint may naturally gather in deeper parts of the texture, so the application needs to be lighter and more controlled.
Drying conditions can make a difference, too. High humidity and low temperatures can slow the drying process. When paint stays wet longer, it has more time to sag.
A paint drip is usually a smaller area of excess paint, while a run is often a longer trail that has moved downward. If several heavy deposits collect together, they can form noticeable paint globs.
Understanding the cause is useful because fixing the surface without changing the painting technique can simply lead to another drip.
What You’ll Need to Fix Paint Drips
The tools required depend on how large and how old the drip is. For a typical dried drip on a painted drywall or plaster wall, you will usually need:
- Fine-grit sandpaper, around 180- to 220-grit
- A flexible putty knife or paint scraper
- Clean microfiber cloth
- Matching wall paint
- Small angled paintbrush
- Small roller if the wall has a roller texture
- Paint tray
- Drop cloth
- Painter’s tape when needed
- Lightweight wall filler for any minor surface damage
A scraper removes the raised paint. Sandpaper then smooths the remaining edge so the repair does not leave a visible ridge.
Do not automatically reach for coarse sandpaper. Very rough paper can scratch the surrounding wall or remove more paint than necessary. Fine-grit paper gives you better control for a small repair.
Your replacement paint should match the original color and sheen. For example, a satin touch-up on an eggshell wall may look noticeably different because it reflects light differently.
If you have leftover paint from the original job, stir it well before use. If you do not have the original paint, take a clean sample or color reference to a paint store when possible. Even a close color match can look different on a large wall.
How to Fix Paint Drips on a Wall
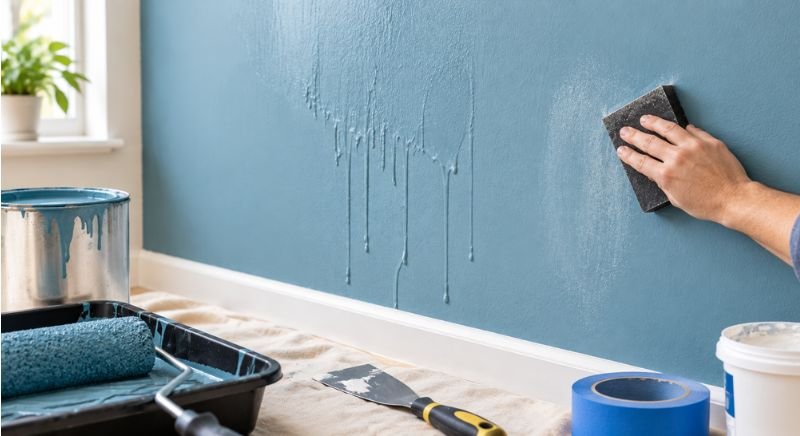
The safest approach to how to fix paint drips on wall surfaces is to deal with the raised paint before worrying about the color.
First, determine whether the drip is wet or dry. Never sand wet paint. Never aggressively scrape paint that has not hardened.
For a dried drip, the repair has six main stages: drying, scraping, sanding, cleaning, painting, and blending.
1. Let the Paint Drip Dry Completely
If the drip has already dried, allow it to become firm before trying to repair it.
This step can be frustrating because scraping immediately feels like the fastest solution. It is not. Soft paint can smear across the wall when you scrape it. Sandpaper can also clog quickly and drag the paint instead of smoothing it.
Follow the drying time stated on the paint container. Remember that drying time depends on the paint, temperature, humidity, ventilation, and thickness of the coat.
A thin surface may feel dry while the thicker center of the drip remains soft underneath. Pressing hard on it can leave a mark or cause the buildup to move.
If the paint is still soft, wait longer.
If the drip is still wet, do not wait for it to dry just so you can scrape it. A fresh drip can often be corrected more easily before it hardens. The wet-paint method is covered in detail below.
2. Scrape Off the Paint Drip
Once the paint has hardened, use a flexible putty knife or paint scraper to reduce the raised area.
Hold the blade at a low angle instead of pointing it directly into the wall. Apply light pressure and make short strokes.
Start with the highest part of the drip. Remove a little paint at a time until the buildup is close to the surrounding surface.
Do not try to make the area perfectly smooth with the scraper alone. The purpose of scraping is to remove the bulk of the excess paint. Fine sanding will take care of the remaining ridge.
If the drip is thick, you may need several passes. That is safer than forcing the scraper through the entire buildup in one motion.
Be especially careful on drywall. If you see the scraper digging into the paper surface or removing sound paint around the drip, stop and reduce the pressure.
A successful repair should remove the excess paint while leaving the wall underneath intact.
3. Sand the Area Smooth
After scraping, fine sanding removes the remaining ridge.
Use 180- to 220-grit sandpaper or a fine sanding sponge. Sand the drip itself and gradually work outward around the edges.
The goal is not simply to make the center flat. The entire transition needs to be smooth. If you sand only the highest point, a sharp edge may remain around it.
Use light pressure. Aggressive sanding can create a shallow hollow that becomes more noticeable after repainting.
You can check your progress in two ways. First, look at the wall from the side with a light shining across it. Second, gently run your fingertips over the repair. If you can feel a ridge, the surface is not ready for paint.
On textured walls, be more careful. The repaired area should blend with the existing texture rather than becoming a perfectly flat patch surrounded by texture.
If sanding exposes drywall or leaves a small depression, stop. Fill the damaged area with an appropriate wall-repair compound, let it dry, and sand it smooth before continuing.
4. Clean the Wall Surface
Sanding creates fine dust that can become trapped in your new coat of paint.
Use a clean microfiber cloth to remove the dust from the repaired area. A slightly damp cloth is usually enough for a small repair.
Do not saturate the wall. Excess water can cause problems on drywall and can affect some existing paint finishes.
Give the surface time to dry before painting.
This is also your final chance to check the repair before adding new paint. Look at the area from different angles and feel it with your fingertips.
If you can still see a raised line, go back and smooth it. If the surface feels level but looks slightly dull, that is normal after sanding. The new paint will restore the finish.
5. Apply a Thin Coat of Paint
Use the matching wall paint and apply a thin coat to the repaired area.
A small angled brush is useful for a narrow repair. If the original wall was rolled, a small roller can help reproduce the same surface texture.
Avoid loading the brush with a large amount of paint. You have already removed one drip, so there is no reason to create another one.
Apply enough paint to cover the repaired area without leaving a thick edge. Work from the center outward and reduce the amount of paint as you approach the surrounding surface.
Do not judge the final color while the paint is wet. Wet paint can look darker, lighter, or glossier than it will after drying.
Allow the coat to dry fully before deciding whether another coat is needed.
6. Blend the Repaired Area
The final goal is not just to cover the repair. It is to make the repaired section look like part of the original wall.
Keep the paint thin toward the outside of the touch-up. This creates a softer transition instead of a noticeable painted circle or square.
Match the original application method whenever possible. If the wall has roller texture, use a similar roller. If the surrounding finish was created with a brush, use a similar stroke pattern.
After the paint dries, inspect the repair in normal lighting and from several angles.
If you can see a smooth patch against a textured wall, the application method may not match. If the surface looks right but the color seems different, the original wall paint may have aged or the sheen may not match.
In those cases, repeatedly painting the same small spot may make the repair more obvious. Repainting a larger section between natural stopping points can provide a more consistent finish.
How to Fix Paint Runs on a Wall
A paint run is usually longer than a simple drip. It may appear as a raised vertical line that starts where excess paint collected and then moved downward.
If the run is still wet, remove excess paint from your brush or roller and gently redistribute what remains on the wall. Do not repeatedly brush the same area.
For a dried run, use a scraper to carefully remove the raised portion. Work gradually along the length of the run.
Once the excess has been removed, sand the remaining ridge with fine-grit paper. Blend the edges into the surrounding wall rather than creating a deep hollow.
Clean the dust and apply a thin coat of matching paint.
If you are searching for how to fix paint runs, remember that paint should not be used to level the surface. The wall needs to be smooth first.
For how to fix paint runs on wall surfaces that have a thick buildup, inspect the area after scraping. If the wall itself has been gouged, use a suitable filler before painting.
How to Fix Dripping Paint Before It Dries
Fresh dripping paint is easier to correct than dried paint.
The moment you notice a drip, stop adding paint to that section. Remove excess paint from the brush or roller before touching the wall again.
Then gently smooth the drip into the surrounding wet paint. Use controlled strokes rather than scrubbing back and forth.
Do not keep working the area simply because you can still see a difference in sheen. Wet paint can settle and level slightly as it dries.
If the drip has already started to become tacky, stop brushing it. Partially dried paint can develop brush marks or a rough surface when disturbed.
Let it dry and repair it as a dried drip.
This is one of the easiest answers to how to fix dripping paint because catching the problem early can eliminate the need for scraping and sanding.
While painting, inspect the wall every few minutes. Look closely at corners, trim, window edges, and the lower sections of the wall because excess paint tends to collect in these areas.
How to Fix Dried Paint Drips and Globs
Dried paint globs need more preparation than a thin drip because there may be a thick layer of hardened paint sitting above the wall.
Start by checking the full size of the buildup. Side lighting can help you see the highest points.
Use a putty knife to carefully remove the thickest portion. Work in small sections instead of trying to remove everything with one hard push.
Once the bulk is gone, use fine-grit sandpaper to smooth the remaining edges.
If the dried paint has pulled away part of the wall surface, fill the damaged area after removing the loose material. Let the filler dry completely, then sand it until it is level.
Clean the dust before applying paint.
For anyone asking how to fix dripped paint, this preparation step is important. A dried drip is not just a color problem. It is a raised surface problem. Fresh paint cannot make a raised surface flat.
The same principle applies to how to fix running paint. Remove or level the excess material before applying another coat.
How to Fix Paint Drips Without Sanding
Not every drip requires sanding.
If you catch a small drip while it is still wet, you can usually remove the excess and smooth the remaining paint before it dries.
A very small dried drip may also be removed carefully with a scraper. This can work when the buildup is thin, and the scraper can level it without damaging the wall.
However, sanding is often the better option for a dried ridge. Even after scraping, a thin raised edge may remain. Fine sandpaper removes that edge and creates a smoother transition.
So, if you are wondering how to fix paint drips without sanding, the answer depends on the condition of the paint. Fresh drips are the easiest to correct without sanding. Small hardened drips may also be scraped. Large or stubborn dried drips usually need light sanding for the best finish.
When deciding how to fix drips in paint, avoid skipping surface preparation simply to save a few minutes. A visible ridge will usually remain visible after repainting.
How to Prevent Paint Drips and Runs
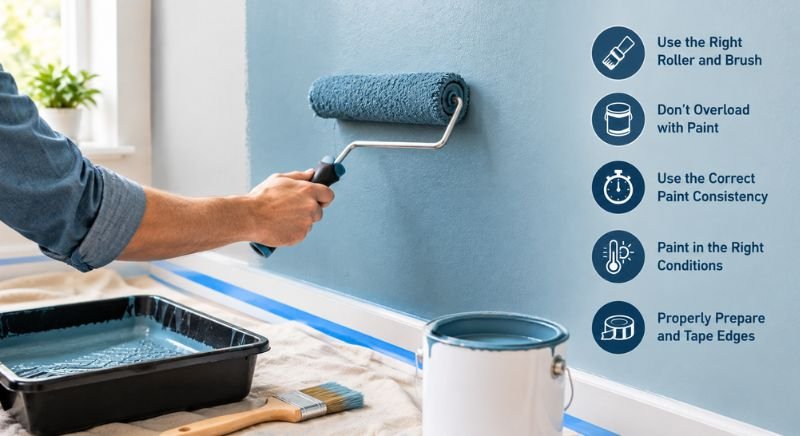
Once you know what causes a drip, prevention becomes much easier.
Good paint control is more important than painting quickly. Take enough time to distribute the paint evenly before moving to the next section.
Use the Right Amount of Paint
Too much paint does not mean better coverage.
Load your brush or roller with enough paint to cover the wall evenly. Remove excess paint before applying it to the surface.
Watch for areas that look unusually wet or glossy. If paint begins collecting along an edge, spread it before leaving that section.
The correct amount will vary with the paint, tool, wall texture, and manufacturer’s instructions. Follow the recommended application method rather than assuming a heavier coat will save time.
Avoid Overloading Your Brush or Roller
An overloaded tool is a common cause of a paint drip.
With a roller, distribute the paint evenly across the roller and remove excess in the tray. With a brush, avoid carrying a large pool of paint on the bristles.
Pay extra attention near ceilings and corners. Gravity can pull excess paint downward while you are working elsewhere.
A properly loaded tool gives you much more control over the thickness of each stroke.
Apply Thin, Even Coats
Thin, even coats are easier to control than one heavy coat.
If you need more coverage, allow the first coat to dry and apply another according to the paint manufacturer’s recommended recoat time.
Do not rush the second coat. Applying fresh paint too soon can disturb the first layer and create dragging, uneven coverage, or runs.
Controlled coats are also much easier to touch up if a small section needs correction.
Maintain the Right Painting Technique
Use consistent strokes and work in manageable sections.
Avoid repeatedly going over paint that has started to set. If you keep moving partially dried paint, the surface can become uneven.
Check the wall as you go rather than waiting until the entire room is finished.
Pay particular attention to:
- Inside corners
- Outside corners
- Window edges
- Door frames
- Areas beneath windows
- The bottom of the wall
- Places where brushwork meets roller work
Good lighting helps too. A wall that looks smooth from straight on may reveal paint drips when light hits it from the side.
Final Thoughts
A small drip does not have to ruin a fresh paint job. Once you understand how to fix paint drips on wall surfaces, the repair becomes a straightforward process rather than a reason to start over.
For a dried drip, focus on the surface first. Scrape away the excess, sand the remaining ridge, remove the dust, and then apply a thin coat of matching paint. For fresh dripping paint, act while the paint is still workable and gently redistribute the excess instead.
The most important lesson is to avoid covering a surface problem with more paint. If a drip is raised, level it before repainting. If the wall texture has been damaged, restore the surface before worrying about the color.
Better paint control also prevents future problems. Use a reasonable amount of paint, avoid overloaded tools, work in thin coats, and check the wall as you go.
With those habits, fixing an occasional paint drip, run, or buildup becomes much easier—and your finished wall is far more likely to stay smooth, clean, and even.
FAQs
How Do You Fix Paint Drips on a Wall?
For a dried drip, let the paint harden completely. Carefully scrape away the raised buildup, sand the remaining ridge with fine-grit paper, and remove the dust. Then apply a thin coat of matching paint and blend the edges.
For a wet drip, remove the excess paint and gently smooth the area before it dries.
How Do You Fix Paint Runs?
To how to fix paint runs properly, first determine whether the run is wet or dry. Smooth a wet run carefully before it sets. Scrape and lightly sand a dried run before repainting.
Do not simply cover a raised run with another heavy coat because the uneven surface can remain visible.
How Do You Fix Dripping Paint?
The best way to how to fix dripping paint depends on its condition. Fresh paint can usually be redistributed gently. Dried paint needs to be scraped, smoothed, cleaned, and repainted.
The sooner you notice a wet drip, the easier it is to correct.
How Do You Fix Paint Drips Without Sanding?
Small wet drips can often be corrected without sanding. A thin dried drip may also be scraped carefully.
If scraping leaves a raised edge, fine sanding is usually necessary to create a smooth transition before repainting.
Can You Paint Over a Dried Paint Drip?
You can apply paint over it, but doing so will not normally remove the raised shape.
A dried drip should be leveled first. Otherwise, the new paint may make the bump less noticeable in some lighting, but it will not actually make the surface smooth.
Why Does Paint Keep Running on My Wall?
Paint may keep running because too much paint is being applied, the brush or roller is overloaded, the coats are too thick, or the same area is being overworked.
Drying conditions can also contribute. If paint remains wet for a long time, gravity has more time to pull it downward.
Use smaller amounts of paint, distribute them evenly, and follow the product’s recommended drying and recoat times.