
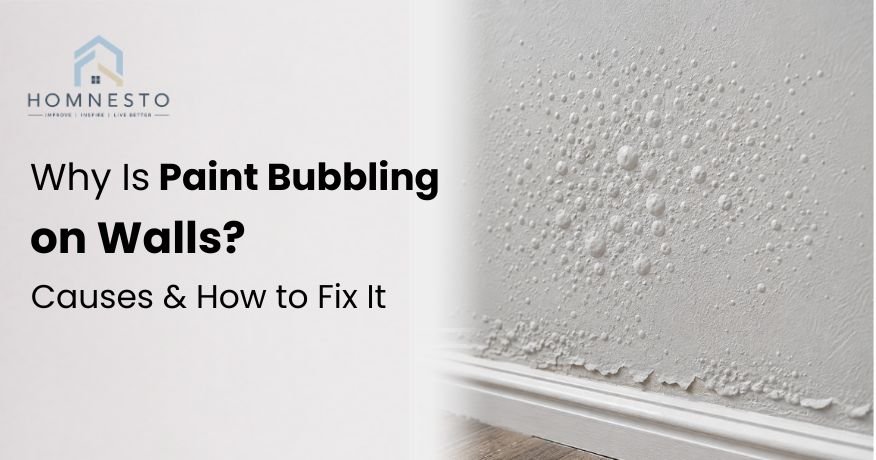

Seeing bubbles, blisters, or raised patches on a freshly painted wall can be frustrating, especially when the paint looked smooth when you finished. Sometimes the problem appears within hours. In other cases, small bumps slowly grow over days or weeks.
Paint bubbling on wall surfaces usually means the paint has lost proper contact with the surface underneath. Moisture is one of the most common reasons, but it is not the only one. Poor surface preparation, painting over a damp wall, trapped air, excessive heat, incompatible paint layers, and high humidity can also cause the finish to lift.
The first step is to identify why the paint is bubbling. Simply scraping the damaged area and applying another coat may hide the problem temporarily, but the bubbles can return if moisture or poor adhesion remains underneath.
This guide explains what causes bubbling paint, why bathrooms are especially vulnerable, how to repair damaged areas properly, when you can paint over bubbles, and when the problem calls for professional help.
Why is My Paint Bubbling on the Wall?
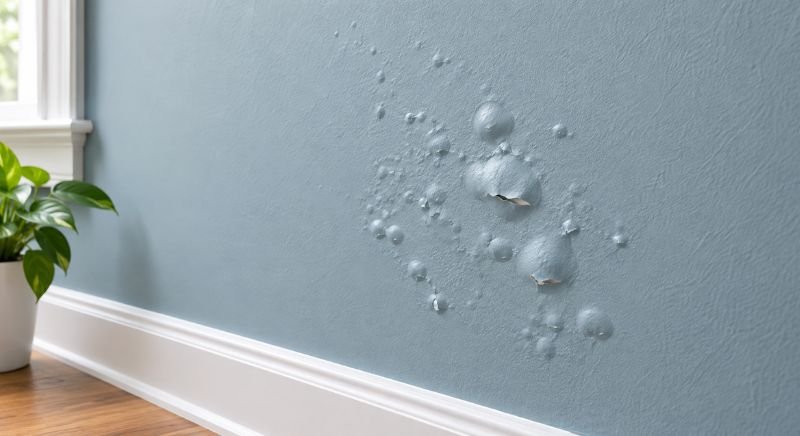
If you notice paint bubbles on wall surfaces, look closely at where they appear and what the surrounding wall looks like.
Small isolated bubbles may point to trapped air or a localized adhesion problem. Larger blisters, peeling sections, or soft areas are more concerning because they can indicate moisture beneath the coating.
The location can provide an important clue. Bubbling near a bathroom, kitchen, window, ceiling, exterior wall, or plumbing fixture deserves closer inspection. A wall that repeatedly develops bubbles in the same area may have an ongoing moisture source rather than a simple painting defect.
The age of the paint matters too. Bubbles after painting wall surfaces may indicate that the coating was applied under poor conditions or that the surface was not prepared correctly. Bubbling that appears months later can be more closely related to moisture, humidity, leaks, or changes in the wall beneath the paint.
Look for other signs such as:
- Soft or swollen drywall
- Peeling paint
- Brown or yellow stains
- Damp or cool patches
- Musty odors
- Cracked caulk around fixtures
- Discoloration around windows
- Repeated bubbling after repainting
These clues help determine whether you are dealing with a paint problem or a larger wall problem.
What Causes Paint to Bubble?
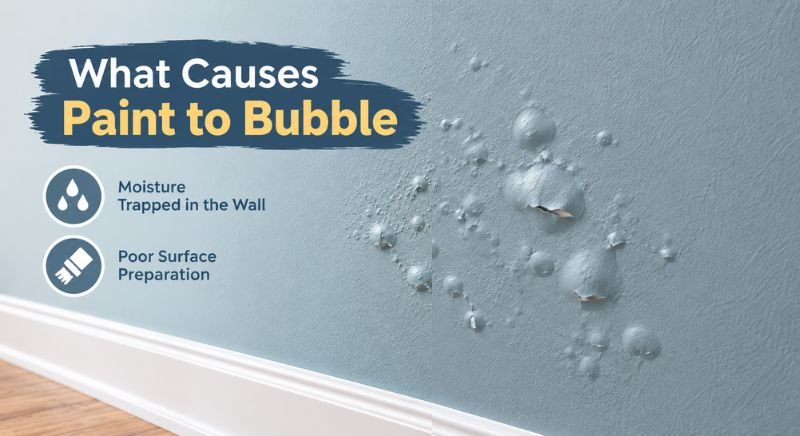
There are several reasons why does paint bubble after application or long after the wall has been painted. The key is understanding what is happening between the paint film and the surface underneath it.
Moisture and Water Behind the Paint
Moisture is one of the most important causes of bubbling.
When water gets behind a paint coating, it can weaken the bond between the paint and the wall. As moisture accumulates, the coating may lift away from the surface and form raised pockets.
This can happen because of a plumbing leak, roof leak, damaged exterior siding, leaking window, condensation, or water entering through cracks.
If you see water behind paint on wall surfaces, repairing the paint alone will not solve the problem. The source of the water needs to be found and corrected first.
In some cases, the damaged coating may also be connected to bubbled paint water damage. Look for stains, swollen drywall, soft spots, or recurring damage.
A small water bubble in wall materials can be a warning sign that moisture is trapped behind the visible paint damage. Do not assume every bubble is caused by water, but do investigate moisture whenever the location or surrounding damage suggests it.
High Humidity and Condensation
High humidity can create conditions where paint struggles to remain firmly bonded, especially in poorly ventilated rooms.
Bathrooms are the obvious example, but laundry rooms, kitchens, basements, and other areas can also experience high moisture levels.
When warm, humid air meets a cooler wall, condensation can form. Repeated exposure can gradually affect the paint and underlying surface.
If the wall is repeatedly exposed to moisture but never gets enough time to dry, the coating may eventually blister, peel, or develop wall paint bubbles.
Improving ventilation can help, but it will not repair existing water damage. If there is an active leak or water intrusion, that problem needs to be addressed separately.
Poor Surface Preparation
Paint needs a clean, sound surface to adhere properly.
Dust, grease, loose old paint, chalky residue, wallpaper adhesive, and other contaminants can interfere with adhesion. Painting directly over a failing coating can also cause the new layer to lift.
This is one reason paint blistering on wall surfaces can occur even when there is no obvious leak.
Before painting, loose material should be removed and the surface should be cleaned and prepared according to the paint manufacturer’s instructions.
If the old paint is already peeling or bubbling, adding another layer on top usually does not create a durable repair.
Painting on a Damp or Wet Wall
Paint applied to a damp surface may fail to bond correctly.
The wall can look dry on the outside while still holding moisture underneath. This is especially possible with drywall, plaster, masonry, or areas that have recently been exposed to water.
Painting too soon after cleaning or repairing a wall can also trap moisture beneath the coating.
Allow the surface to dry thoroughly before priming or painting. If the wall repeatedly becomes damp, find out why before applying a new finish.
Excessive Heat During Painting
Heat can affect how paint dries and forms its film.
Painting in excessively hot conditions can cause the surface to dry too quickly while the underlying paint behaves differently. Direct sunlight can also heat a wall significantly.
This uneven drying can contribute to poor adhesion, blistering, or other finish problems.
Always check the temperature range and application conditions listed on the paint container. Do not assume that warmer conditions automatically mean faster and better drying.
Incompatible or Multiple Paint Layers
Different paint layers do not always behave the same way.
If a new coating is applied over an old finish that is loose, incompatible, glossy without proper preparation, or otherwise unsuitable, adhesion can fail.
The problem can become more noticeable when several layers of paint have built up over time.
If bubbling paint appears after repainting, consider whether the old coating was properly prepared. A new coat cannot reliably hold down a weak layer underneath it.
Air Bubbles in Paint and Trapped Air
Not every bubble is caused by water.
Air bubbles in paint can develop during application. Rolling too aggressively, working the paint excessively, using the wrong roller, or applying paint under unsuitable conditions can introduce or trap air.
These bubbles may appear while the paint is being applied or shortly afterward.
The distinction is important. Tiny surface bubbles caused during application may disappear as the coating levels. Larger bubbles that remain, grow, or become blisters require closer investigation.
If you notice bubbles in the paint immediately during application, stop repeatedly rolling the same section. Allow the coating to settle and follow the product’s application instructions.
Why Is Paint Bubbling in a Bathroom?
Bathrooms are especially prone to paint problems because they regularly experience steam, humidity, splashes, and temperature changes.
If you notice paint bubbling in bathroom areas, first check ventilation. A bathroom with poor airflow can stay humid long after a shower ends.
Look closely around:
- Shower and bathtub walls
- Ceiling areas above the shower
- Window frames
- Sink and plumbing connections
- Areas behind toilets
- Caulked joints
- Exterior-facing walls
Persistent moisture can contribute to bubbled paint in bathroom surfaces, but bubbling does not automatically mean there is a hidden leak.
If bubbling is accompanied by staining, a soft wall, peeling drywall paper, a musty smell, or recurring wetness, investigate the wall for water intrusion.
In bathrooms where condensation is the main issue, better ventilation and moisture control can reduce future problems. A suitable bathroom paint may also help, but it cannot compensate for an active leak or a chronically damp substrate.
If you notice mold bubbling paint, treat the moisture problem as the priority. Do not simply paint over visible mold or moisture damage.
How to Fix Bubbling Paint on a Wall
The correct approach to how to fix bubbling paint depends on the cause.
Do not begin by scraping every bubble you see. First determine whether moisture, a leak, poor adhesion, or another issue is responsible.
Once the underlying problem is corrected, the damaged paint can be removed and the surface repaired.
Find and Fix the Source of Moisture
If moisture is causing the problem, repair the source before touching up the paint.
Check nearby plumbing, windows, ceilings, exterior walls, and other possible entry points.
For example, bubbling near a bathroom fixture may require inspection of plumbing or failed caulk. Bubbling near a window may point to water intrusion around the frame. A ceiling bubble may require investigation above the ceiling rather than a simple paint repair.
If you experience a water bubble in wall after rain, inspect the exterior as well as the interior. Repeated bubbling after rainfall can indicate water entering through the building envelope.
Likewise, exterior paint bubbling after rain can indicate moisture entering through cracks, failed sealant, damaged siding, or another exterior defect.
Do not seal over the visible damage and assume the problem is solved. The moisture source needs to be addressed first.
Let the Wall Dry Completely
After the moisture source has been corrected, give the wall enough time to dry.
The required time depends on the wall material, how much moisture entered it, ventilation, temperature, and humidity.
Do not rely only on the surface feeling dry. A wall can feel dry while moisture remains deeper inside.
If drywall is swollen, soft, crumbling, or severely damaged, replacing the affected material may be necessary rather than simply repainting it.
Painting over a damp substrate can trap moisture again and lead to another round of bubbling.
Scrape Away Loose or Bubbled Paint
Once the wall is properly dry, remove paint that has lost adhesion.
Use a putty knife or paint scraper to lift loose sections. Do not force firmly attached paint away just because it is close to a damaged area.
Work until you reach a stable coating with firm edges.
If the paint continues to lift easily around the repair, stop and investigate further. Widespread loose paint can indicate a larger adhesion or moisture problem.
Wear appropriate eye protection when scraping overhead areas, and protect the floor from falling paint chips.
Sand the Damaged Area Smooth
After removing the loose paint, sand the edges so the repaired section transitions smoothly into the surrounding wall.
Fine- to medium-grit sandpaper can be appropriate depending on the condition of the surface and the material being repaired. Avoid aggressive sanding that damages drywall paper or creates a deep depression.
Run your fingers over the area after sanding. A sharp edge or noticeable ridge can remain visible after repainting, especially under strong side lighting.
If the substrate is damaged or uneven, use a suitable wall-repair compound before final sanding.
The goal is a stable, smooth surface, not simply a patch covered with fresh paint.
Apply Primer
Primer helps create a consistent surface for the new paint.
It is particularly useful when the repair has exposed bare drywall, filler, or another different surface. The appropriate primer depends on the substrate and the type of problem being repaired.
If the original problem involved stains or water damage, use a primer designed for the specific surface issue rather than assuming ordinary wall paint will block the stain.
Allow the primer to dry according to the manufacturer’s instructions before applying the finish coat.
Repaint the Repaired Area
Once the surface is dry, smooth, clean, and properly primed, apply the matching wall paint.
Use the same finish and application method as the surrounding wall whenever possible.
Do not apply a heavy coat simply to hide the repaired area. Several controlled coats may provide a better result than one thick application.
If the color or sheen does not blend well, you may need to repaint a larger section of the wall to create a consistent appearance.
This is the practical process for how to fix paint bubbles on wall surfaces when the damaged area is limited.
Should You Paint Over Bubbling Paint?
No, not if the existing paint is loose, swollen, or actively bubbling.
Painting directly over paint bubbles may cover them temporarily, but it does not restore the failed bond underneath.
If moisture caused the problem, another coat can trap the issue beneath the surface. If poor adhesion caused it, the new paint may eventually lift along with the unstable layer underneath.
The correct sequence is:
- Identify the cause.
- Correct moisture or other underlying problems.
- Let the surface dry.
- Remove loose paint.
- Smooth the damaged area.
- Prime where appropriate.
- Apply fresh paint.
A small, stable surface imperfection is different from active bubbling. When the existing coating has clearly lost adhesion, repair it rather than simply covering it.
How to Prevent Paint From Bubbling Again
Preventing future bubbling starts before the next coat goes on the wall.
The most important step is making sure the surface is suitable for painting in the first place.
Fix Moisture Problems Before Painting
Never treat bubbling caused by water as only a cosmetic problem.
Find the source and repair it. This may involve plumbing, roofing, windows, exterior sealants, condensation, or another moisture pathway.
A fresh coat of paint cannot stop water from reaching the wall.
Prepare the Wall Properly
Remove loose paint, dirt, grease, dust, and other contaminants before painting.
Repair cracks, holes, and damaged areas as needed. Allow repair materials to dry before applying primer or paint.
A clean, stable surface gives the new coating a much better foundation.
Use the Right Primer
Primer can improve adhesion and create a more uniform surface when used appropriately.
Choose a primer based on the wall material and the condition of the surface. Bare drywall, repaired areas, stained surfaces, and previously painted walls may have different requirements.
Follow the primer’s application and drying instructions rather than treating it as interchangeable with ordinary paint.
Avoid Painting on Damp Surfaces
Before painting, make sure the wall is dry.
This is particularly important after cleaning, repairing water damage, or dealing with high humidity.
If the room is humid, improve airflow and allow the surface to dry before applying the coating.
Control Humidity and Improve Ventilation
Good ventilation reduces excessive moisture in rooms such as bathrooms and kitchens.
Use exhaust fans where appropriate, keep air moving, and address persistent condensation rather than allowing moisture to repeatedly accumulate on walls.
If humidity remains unusually high despite normal ventilation, investigate the underlying cause.
Follow Paint Temperature and Drying Requirements
Always check the manufacturer’s recommended temperature, humidity, drying, and recoat conditions.
Do not paint in direct intense heat if the product advises against it. Likewise, avoid applying paint when conditions are too cold or damp.
Give each coat enough time to dry before applying another.
These simple steps can significantly reduce the chance of bubbling under paint or adhesion failure later.
When Should You Call a Professional?
A small isolated bubble can often be repaired as a DIY project. Professional help becomes more appropriate when the bubbling appears widespread, keeps returning, or is connected to suspected water damage.
Consider getting professional help if:
- The wall feels soft or swollen.
- Bubbling returns after repair.
- You cannot identify the moisture source.
- There is extensive staining.
- A ceiling is bubbling after a suspected leak.
- There is significant mold growth.
- Drywall has become damaged or crumbles when touched.
- Water enters the wall after rain.
- A large section of paint is peeling or blistering.
A professional can help identify whether the visible paint failure is actually a symptom of a plumbing, roofing, exterior, or structural moisture problem.
Conclusion
Paint bubbling on wall surfaces is usually a sign that something has affected the bond between the paint and the surface beneath it. Moisture is a major cause, but poor preparation, humidity, heat, trapped air, and incompatible coatings can also play a role.
The most important repair rule is to fix the cause before fixing the appearance. Remove loose paint only after the wall is dry and stable, smooth the damaged area, prime when needed, and then repaint with the appropriate product and technique.
If bubbling keeps returning, becomes widespread, or appears alongside water damage or mold, treat it as more than a painting issue. Finding the underlying cause can save you from repeatedly repairing the same wall and help keep the next coat smooth for much longer.
FAQs
Will Paint Bubbles Go Away on Their Own?
Some very small bubbles that appear during application may flatten as the paint levels and dries. However, persistent bubbles, blisters, or raised areas should not be expected to disappear on their own.
If the bubbling is caused by moisture or poor adhesion, the underlying problem needs to be corrected.
What Causes Paint to Bubble?
Common causes include moisture behind the paint, high humidity, condensation, painting over a damp surface, poor preparation, excessive heat, incompatible paint layers, and trapped air.
The location and appearance of the damage can help identify the likely cause.
How Do You Fix Paint Bubbles on a Wall?
First find and correct the cause. If moisture is involved, allow the wall to dry completely. Remove loose or bubbled paint, sand the edges smooth, prime the repaired area when appropriate, and apply matching paint.
Simply painting over the bubbles is unlikely to provide a lasting repair.
Can Moisture Cause Paint to Bubble?
Yes. Moisture can weaken the bond between the paint and the wall, causing the coating to lift and form bubbles or blisters.
If you suspect water under paint, investigate the source before repairing the visible surface.
Why Is My Wall Paint Bubbling After Painting?
If why is my paint bubbling is the question immediately after a painting project, possible causes include painting over a damp or poorly prepared surface, excessive heat, trapped air, an unsuitable application technique, or an unstable previous coating.
If bubbling appears later, moisture or changes in the underlying wall should also be considered.