

A good paint job starts long before the first roller touches the wall. Small holes, cracks, stains, peeling paint, and rough patches can all affect the final result.
That is why wall repair and painting should be handled as one connected project. The process starts with checking the surface, identifying damage, and making the right repairs. It then moves into cleaning, sanding, priming, painting, and final touch-ups.
This wall repair and painting guide covers the most common problems homeowners face with interior walls. It explains how to assess damage, use practical wall repair techniques, prepare walls for painting, choose paint and primer, and get a smoother finish.
Whether you need basic wall repair, interior wall repair, or complete interior wall painting, the right preparation can make the finished surface look cleaner and last longer.
How to Assess Wall Damage Before Repairing or Painting
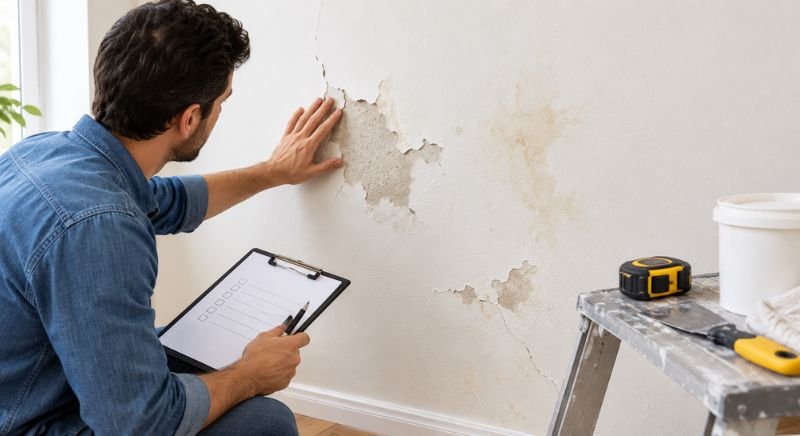
Before starting any wall repair, inspect the entire surface carefully. Good assessment helps you identify whether you are dealing with a simple cosmetic issue or a problem that needs more attention.
Look for holes, dents, wall cracks, loose paint, stains, bubbling, nail pops, damaged corners, and uneven areas. Also check around windows, doors, ceilings, plumbing fixtures, and other areas where moisture or movement may occur.
This first inspection is an important part of wall preparation before painting because paint should not be used to hide an unresolved surface problem.
Common Types of Wall Damage
Common wall problems include nail holes, dents, small cracks, peeling paint, paint drips, bubbling paint, and damaged drywall.
Drywall can also develop fastener problems known as drywall nail pops. Water exposure may create stains, soft spots, swelling, or damaged sections.
Some problems are easy to repair with basic tools. Others may indicate moisture, movement, or damage beneath the visible surface.
Understanding these common wall problems helps you choose the right repair method instead of treating every defect the same way.
How to Tell If a Wall Needs Repair
Look at the wall from different angles and inspect it under good lighting. Run your hand lightly across the surface to find raised areas, dents, rough patches, or soft spots.
A small hole in drywall may only need a simple patch. A wider crack, loose drywall, or damaged surface may need more extensive drywall repair.
Peeling or loose paint should also be addressed before painting. If you skip the repair, the new coating may highlight the same defect.
This inspection is an important part of any wall repair guide because the condition of the existing surface determines what should happen next.
When Water Damage Requires More Than Painting
Water damage should never be treated as an ordinary painting problem.
Water stains on walls or a water stain on ceiling can indicate a plumbing leak, roof issue, condensation, or another moisture source. Painting over the stain without fixing the cause can lead to more bubbling, peeling, or staining.
Check whether the affected material feels soft, swollen, or weak. Significant drywall damage may require replacement rather than a simple patch.
How to Prepare a Damaged Wall for Repair
Start by removing loose material around the damaged area. Scrape away unstable paint and clean away dust, dirt, adhesive, or other contaminants.
For larger damage, make sure the surrounding drywall is stable before applying patching material. Small repairs can usually be handled with appropriate spackle or joint compound.
This early surface preparation makes later repairs easier and helps the repair material bond properly.
How to Repair Common Wall and Drywall Damage
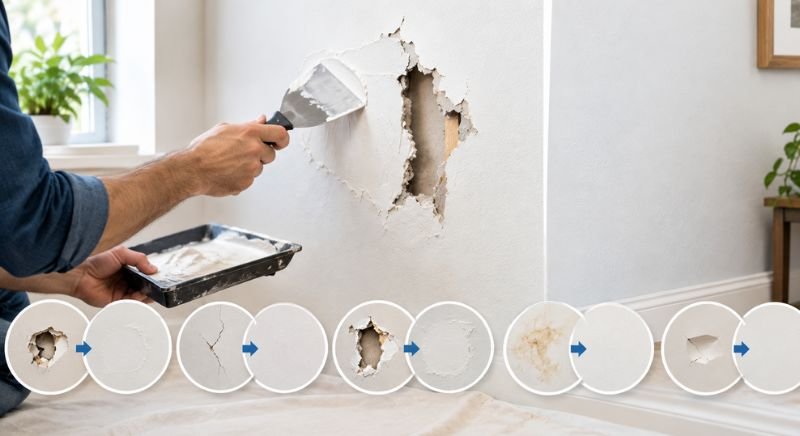
The right repair depends on the type and size of the damage. Basic drywall repair can handle many everyday problems, but larger or recurring damage may need professional attention.
The goal is not simply to fill a defect. The repaired area should blend into the surrounding surface so it does not become obvious after painting.
How to Patch Small Holes in Drywall
A small nail or screw hole is one of the simplest forms of drywall hole repair.
Remove loose material around the hole and clean away dust. Apply a suitable patching compound with a putty knife, keeping the layer thin and spreading it slightly beyond the damaged area.
Allow the compound to dry according to the product instructions. Then sand the area until it feels smooth and blends with the surrounding wall.
For a detailed process, see how to Patch a Small Hole in Drywall.
How to Repair Small Wall Cracks
Small wall cracks can occur around joints, corners, windows, doors, or other areas where materials move slightly.
Clean out loose material before applying an appropriate repair compound. Keep the repair smooth and feather the edges into the surrounding wall.
If the same crack keeps returning, becomes wider, or appears alongside other signs of movement or moisture, investigate the underlying cause.
For the complete process, see how to Repair Small Wall Cracks Before Painting.
How to Repair Drywall Nail Pops
Drywall nail pops appear when a drywall fastener becomes visible through the surface.
Do not simply cover the bump with another layer of compound. The underlying fastener and surrounding drywall should be stabilized before the area is patched and sanded.
This creates a flatter surface and reduces the chance of the defect becoming visible again.
For step-by-step instructions, see How to Repair Drywall Nail Pops.
How to Fix Cracked Ceiling Corners
Ceiling cracks can appear where walls meet the ceiling. These cracked ceiling corners may result from normal movement, settling, joint problems, or moisture.
Remove loose material and inspect the joint before repairing it. The correct approach depends on the size and cause of the crack.
For detailed instructions, see How to Fix Cracked Ceiling Corners.
How to Repair Water Stains on a Ceiling
A ceiling stain should be investigated before you repaint it.
Find the source of the moisture and correct it first. Then allow the affected area to dry completely before repairing damaged material.
Once the surface is stable and dry, a suitable stain-blocking primer can help prevent the water stain on ceiling from showing through the new paint.
For a detailed guide, see How to Fix a Water Stain on Ceiling.
When Wall Damage Requires Professional Repair
Professional repair may be appropriate when damage is extensive, recurring, or difficult to diagnose.
Consider professional help for large drywall failures, major cracks, widespread water damage, sagging surfaces, or damage that continues after basic repairs.
Electrical, plumbing, structural, or significant moisture problems should also be handled carefully rather than covered with paint.
How to Prepare Walls Before Painting
Proper paint preparation creates the foundation for a successful wall painting project.
Before painting, the surface should be clean, dry, stable, and free from loose material. Repairs should also be fully dry and smooth.
Knowing how to prepare walls for painting helps prevent many problems that would otherwise appear after the new paint dries.
Clean the Walls Before Painting
Dust, grease, grime, soap residue, and other contaminants can affect paint adhesion.
To clean walls before painting, start with a suitable cleaning solution and a soft cloth or sponge. Kitchen walls may need more attention because grease can build up over time.
Do not soak drywall unnecessarily. After cleaning, give the surface enough time to dry before continuing with other preparation steps.
For detailed cleaning instructions, see Best Way to Clean Painted Walls Without Damaging Them.
Remove Loose or Damaged Paint
Loose paint should be removed before applying a new coating.
Use a suitable scraper to remove flaking or unstable areas. Then sand the edges so the transition between the existing paint and exposed surface is less noticeable.
This step is essential when repairing walls before painting because new paint cannot reliably stabilize a failed old coating.
Remove Old Caulk Before Painting
Old caulk can crack, shrink, discolor, or separate from the surface.
Removing caulk before painting creates a cleaner surface for new caulk or paint. Carefully cut and remove the old material, then clean the area before continuing.
For detailed instructions, see How to Remove Old Caulk Before Painting.
Remove Wallpaper Glue from Drywall
Leftover adhesive can leave drywall sticky, uneven, or difficult to paint.
Removing wallpaper glue requires care because aggressive scraping or excessive moisture can damage drywall.
Clean the surface thoroughly after removing the adhesive and allow it to dry before sanding or priming.
For the complete process, see How to Remove Wallpaper Glue from Drywall.
Sand and Smooth the Surface
Sanding helps remove rough edges and smooth repaired areas.
When you sand walls before painting, use an appropriate sanding method for the surface. Avoid aggressive sanding that could damage drywall paper or create deeper imperfections.
After sanding, remove all dust before moving to primer or paint.
Patch and Prime Repaired Areas
Small holes, cracks, dents, and other defects should be repaired before painting.
This is why you should patch walls before painting instead of expecting paint to hide surface damage.
Fresh patches can absorb paint differently from the surrounding wall. Applying primer before painting repaired areas can help create a more consistent surface.
How to Know When a Wall Is Ready for Paint
The wall should be clean, dry, smooth, stable, and free from loose paint.
Run your hand across repaired areas and inspect them under good lighting. If you can easily see or feel a repair before painting, it may still need sanding or additional preparation.
Knowing when the wall is ready is one of the most important parts of how to repair walls before painting.
How to Remove Old Paint Before Repainting
Removing old paint is not always necessary before every repainting project.
If the existing coating is firmly attached and in good condition, cleaning, light sanding, repairs, and proper priming may be enough.
When Should You Remove Old Paint?
Remove old paint when it is peeling, flaking, bubbling, severely cracked, or poorly bonded.
You may not need to strip a stable coating simply because it is old.
The condition of the existing paint matters more than its age alone.
How to Remove Paint from Different Surfaces
Paint removal methods depend on the surface, coating, and size of the project.
Scraping and sanding can work for many small areas. Other situations may require chemical or mechanical removal methods.
Take extra care with drywall because aggressive removal can damage the paper surface underneath.
How to Remove Paint from Concrete
Concrete can hold several layers of old coating, making removal more demanding.
Methods may include scraping, mechanical abrasion, or an appropriate paint-removal product. Choose a method that suits the concrete and existing coating.
For detailed instructions, see how to Remove Paint from Concrete.
How to Prepare the Surface After Paint Removal
After removing paint, clean away dust, residue, and loose particles.
Inspect the exposed surface for holes, cracks, stains, and other defects. Repair and smooth those areas before priming or painting.
The final surface should be clean, dry, stable, and ready for the new coating.
How to Choose Paint and Primer for Walls
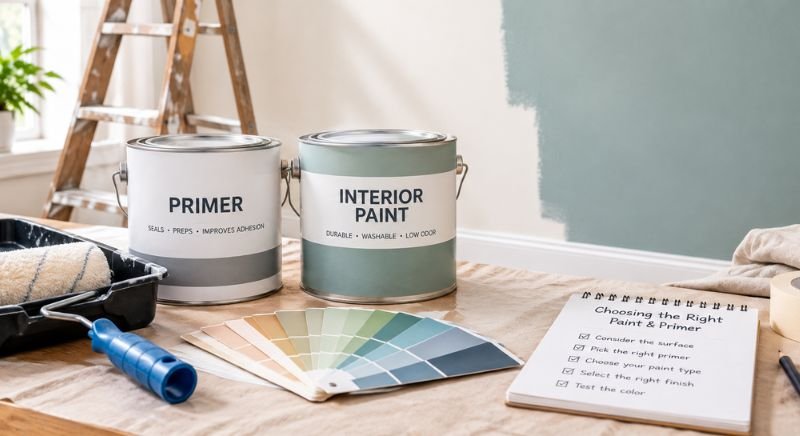
Choosing the right paint is about more than picking a color.
The room, surface condition, cleaning needs, lighting, desired appearance, and existing color can all affect the choice.
The right combination of primer and paint can also make interior wall painting more consistent.
When Do You Need Primer Before Painting?
Primer before painting is particularly useful on fresh drywall, repaired areas, porous surfaces, certain stains, and major color changes.
Primer can help create a more uniform base and improve the consistency of the finish coat.
Always follow the product instructions because not every painting project requires a separate primer.
How Many Coats of Paint Do You Need?
The number of coats of paint depends on the existing color, new color, surface condition, paint product, and desired coverage.
A major color change may require additional coverage compared with a similar-color repaint.
For more detailed guidance, see How Many Coats of Paint Do You Really Need.
How to Paint Over Dark Walls
Painting over dark walls can require more attention than repainting with a similar shade.
A suitable primer can help create a more uniform base before the new color is applied. The right preparation can also reduce the amount of finish paint needed.
For a detailed approach, see How to Paint Over Dark Walls Without Priming Twice.
How to Choose the Right Paint Finish
Different interior paint finishes provide different levels of sheen and practical performance.
Lower-sheen finishes can help reduce the appearance of minor surface imperfections. Higher-sheen finishes are generally easier to clean but can make surface flaws more noticeable.
Choose the finish according to the room, traffic, cleaning requirements, and appearance you want.
Semi-Gloss vs. Satin Paint for Trim
When comparing satin vs semi gloss paint for trim, consider both appearance and durability.
Satin provides a softer sheen, while semi-gloss creates a more noticeable shine. Both can work well for trim when the finish suits the room.
For a detailed comparison, see Semi-Gloss vs Satin Paint for Trim.
How to Choose a Wall Paint Color
Consider natural light, artificial lighting, flooring, furniture, and nearby finishes.
Test the color before committing to the entire room. A shade can look different throughout the day as lighting changes.
If you are repainting over an existing color, also consider whether the new shade will require additional coverage.
How to Paint Walls for a Smooth, Even Finish
Once the wall preparation before painting is complete, the painting process becomes easier.
Good technique helps prevent roller marks, visible transitions, drips, and uneven paint lines.
Prepare the Room Before Painting
Move furniture away from the walls and protect floors and remaining furniture with suitable drop cloths.
Remove or protect wall plates, fixtures, and other items that could be exposed to paint.
Keep brushes, rollers, paint, trays, extension tools, and cleanup supplies ready before starting.
Cut In Around Edges and Corners
Use a suitable brush around ceilings, corners, trim, doors, and windows.
Work in manageable sections and avoid letting the cut-in areas dry completely before connecting them with the roller.
Consistent timing can help the finish appear more uniform.
Roll Paint for Even Coverage
Load the roller evenly and work across manageable sections.
Use consistent pressure and overlap adjacent sections while the paint remains workable.
The roller nap should match the wall texture. Smooth walls generally need a different roller than heavily textured surfaces.
How to Avoid Uneven Paint Lines
Uneven paint lines can result from inconsistent pressure, poor overlap, uneven paint loading, or allowing sections to dry before connecting them.
Maintain a consistent working pattern and avoid repeatedly rolling areas after the paint begins to set.
For troubleshooting, see How to Fix Uneven Paint Lines.
How Long to Let Paint Dry Between Coats
Paint drying time depends on the product, temperature, humidity, ventilation, surface, and coat thickness.
Do not apply another coat simply because the surface feels dry to the touch. Follow the manufacturer’s recommended recoat time.
For more guidance, see how long does Paint Take to Dry before a Second Coat.
How to Get a Professional-Looking Finish
A professional-looking finish comes from consistency.
Prepare the surface properly, use suitable tools, maintain even coverage, avoid excessive rolling, and inspect the wall under good lighting.
The better the surface preparation, the less work the paint has to do.
How to Fix Common Painting Problems
Even careful painting walls can sometimes produce problems.
The key is to identify the cause before trying to cover the problem with another coat.
How to Fix Paint Drips on a Wall
Paint drips often happen when too much paint collects in one area.
If the drip is still wet, carefully smooth it without spreading excessive paint. If it has dried, sand the affected area and repaint it as needed.
For detailed instructions, see how to Fix Paint Drips on a Wall.
Why Paint Bubbles or Blisters on Walls
Bubbling paint or blistering can result from moisture, heat, poor adhesion, or surface contamination.
Do not simply paint over the bubbles. Identify the underlying cause, remove failed material, repair the surface, and allow it to dry before repainting.
For more information, see why is Paint Bubbling on Walls.
Why Paint Peels Off Walls
Peeling paint can develop because of moisture, poor surface preparation, contamination, weak adhesion, or incompatible coatings.
Remove unstable paint and address the cause before applying a new coating.
For bathroom-specific problems, see Why Does Paint Peel Off Bathroom Walls.
How to Touch Up Wall Paint
A paint touch up can work well for small scuffs, scratches, or isolated marks.
Clean the area first and use the same paint, sheen, and application method whenever possible.
If the repair remains visible, the wall may need a larger section repainted or a complete new coat.
For more guidance, see How to Touch Up Wall Paint.
How to Match Paint Color Without the Original Can
Matching paint color becomes more difficult when the original can is unavailable.
Take a suitable paint sample to a paint store for color matching. Keep in mind that older paint may have changed because of sunlight, cleaning, aging, or previous touch-ups.
For practical methods, see How to Match Paint Color Without the Can.
How to Deal With Water-Damaged Walls Before Painting
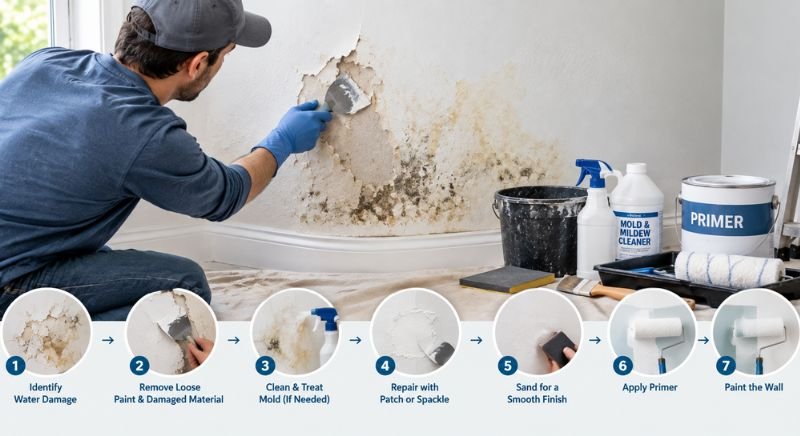
Water-damaged surfaces need repair before they need paint.
Painting too early can trap problems beneath the new coating and lead to recurring stains or coating failure.
Identify the Source of the Water Damage
Look for plumbing leaks, roof problems, window leaks, condensation, or other sources of moisture.
Do not repaint until the source has been corrected.
Let the Wall Dry Before Repairing It
The wall needs to dry sufficiently before patching, priming, or painting.
The required drying period depends on the amount of moisture and surrounding conditions.
Never assume a surface is ready simply because the outside feels dry.
Repair Damaged Drywall and Surfaces
Minor surface damage may be repairable with patching materials.
Severely swollen, soft, crumbling, or extensively damaged drywall may need replacement.
The new surface should be stable before any paint is applied.
Treat Stains Before Applying Paint
Water stains can remain visible through ordinary paint.
After the source has been fixed and the surface is dry, use an appropriate stain-blocking primer when needed.
This step helps prevent old discoloration from showing through the new finish.
When Water Damage Should Be Professionally Inspected
Professional inspection may be appropriate when the moisture source is unclear, damage is widespread, stains keep returning, or drywall has become soft or severely damaged.
Hidden moisture can continue causing problems even after the visible stain has been painted.
How to Get Better Results When Painting Repaired Walls
Fresh repairs can remain visible if the transition between the repaired area and the original wall is not handled properly.
Good drywall repair and painting therefore requires attention to texture, primer, color, sheen, and coverage.
Make Repaired Areas Blend With the Existing Wall
Avoid leaving thick edges around patched areas.
Feather the repair material outward so the transition is gradual. After it dries, sand it smooth and inspect it from different angles.
Use Primer on Repaired Surfaces
Repaired areas can absorb paint differently from the surrounding wall.
A suitable primer helps seal porous patches and creates a more consistent base for the finish coat.
This is particularly useful when several different surface materials exist on the same wall.
Match Texture Before Painting
A smooth patch can stand out on a textured wall even when the paint color matches.
Match the surrounding texture as closely as possible before applying the finish coat.
Texture matching is an important part of achieving a seamless repair.
Match Paint Color and Finish
Color and sheen both affect how a repaired area looks.
When matching paint color, use the closest possible paint and match the existing finish as well.
A sheen difference can make a patch visible even when the color appears close.
Apply Paint for Consistent Coverage
Use a consistent brush or roller technique across the repaired section.
Avoid stopping randomly in the middle of a wall. Differences in texture and application can become more visible once the paint dries.
How to Maintain Painted Walls
Good paint maintenance helps keep walls looking clean and reduces the need for frequent repainting.
Small problems are easier to manage when they are handled early.
How to Clean Painted Walls Without Damaging Them
Use a gentle cleaning method suitable for the paint finish.
Avoid aggressive scrubbing unless the coating is designed to withstand it. Test the cleaning method in an inconspicuous area when you are unsure.
For detailed instructions, see Best Way to Clean Painted Walls Without Damaging Them.
How to Handle Small Scuffs and Marks
Start with gentle cleaning before reaching for touch-up paint.
If the mark does not disappear and the coating remains intact, a small repair may be enough.
Keep leftover paint properly labeled so future touch-ups are easier.
When to Touch Up vs. Repaint
A touch-up makes sense when the damage is small and isolated.
Repainting may be more practical when the wall has many marks, noticeable fading, widespread repairs, or visible differences between old and new paint.
How to Prevent Premature Paint Damage
Control moisture, clean walls appropriately, repair small problems early, and protect painted surfaces from unnecessary impacts.
Good ventilation can also help in rooms where humidity is naturally high.
Wall Repair & Painting Checklist
Inspect the Wall
Check the entire surface for cracks, holes, stains, peeling, bubbling, nail pops, dents, and other visible defects. Look closely at corners, seams, and areas around windows or doors where damage can be easier to miss.
Repair Damage
Complete the necessary wall damage repair before applying new paint. Patch holes, repair cracks, fix damaged drywall, and address any loose or unstable areas so the surface is ready for preparation.
Clean and Prepare the Surface
Remove dirt, dust, loose paint, adhesive, grease, and other contaminants from the wall. A clean surface helps primer and paint bond properly and creates a more even finish.
Sand and Prime
Sand repaired areas until they feel smooth and blend with the surrounding surface. Apply primer where appropriate, especially over repairs, stains, or surfaces that may absorb paint unevenly.
Choose Paint and Finish
Consider the paint color, sheen, room use, lighting, durability, and cleaning needs before choosing your product. The right finish can also make the wall easier to maintain over time.
Apply the Paint
Cut in carefully around edges, corners, trim, and fixtures before rolling the main wall surface. Apply paint with consistent pressure and coverage to reduce visible lines, roller marks, and uneven areas.
Inspect and Touch Up the Finished Wall
Check the completed wall under good lighting and view it from different angles. Correct small imperfections, missed spots, or uneven coverage before considering the project finished.
When Should You Repair, Repaint, or Replace a Wall?
The condition of the wall should determine whether you patch it, repaint it, or replace part of it. A small cosmetic defect may need only a simple repair, while widespread or severe damage may call for a larger solution.
When a Simple Patch Is Enough
A simple patch is usually suitable for small nail holes, shallow dents, and minor stable cracks. The repair should be fully dry, smooth, and properly prepared before painting.
When the Wall Should Be Repainted
Repaint when the existing coating is worn, faded, heavily marked, or too damaged for practical touch-ups. Repainting can also make sense when you want to change the room’s color or finish.
When Extensive Damage Requires Replacement
Replacement may be necessary when drywall is severely swollen, crumbling, extensively damaged by water, or unable to provide a stable surface. Paint should not be used to hide material that is no longer sound.
When to Call a Professional
Professional assistance may be appropriate for major drywall damage, recurring cracks, significant water intrusion, structural concerns, or repairs that extend beyond basic homeowner skills.
Wall Repair & Painting FAQs
Should You Repair Walls Before Painting?
Yes. Repair holes, cracks, peeling paint, damaged drywall, stains, and other surface problems before painting. New paint works best on a stable, clean, and properly prepared surface.
How Do You Prepare a Damaged Wall for Painting?
Start by removing loose material and cleaning the surface. Repair holes and cracks, allow the repair to dry, sand the area smooth, remove dust, and apply primer where needed.
Do You Need Primer After Repairing Drywall?
Often, yes. Fresh drywall repairs can absorb paint differently from the surrounding wall. Primer can help seal the repaired area and create a more consistent base for the finish coat.
How Many Coats of Paint Should You Apply?
The required number of coats depends on the existing color, new color, paint product, surface condition, and desired coverage. Follow the manufacturer’s instructions for the specific product.
How Long Should Paint Dry Before a Second Coat?
Follow the manufacturer’s recommended recoat time. Paint drying time varies based on the paint, temperature, humidity, ventilation, surface, and coat thickness.
How Do You Fix Uneven Paint on a Wall?
Identify the cause first. Uneven coverage can result from poor preparation, inconsistent application, insufficient paint, or differences in surface absorption. Correct the underlying issue before applying another coat.
Why Does Paint Bubble or Peel Off Walls?
Paint can bubble or peel because of moisture, poor preparation, contamination, weak adhesion, heat, or incompatible coatings. Remove failed paint and address the underlying cause before repainting.
How Do You Match Existing Wall Paint?
Use the original paint when available. If it is unavailable, take a suitable sample to a paint store for color matching. Remember that older paint may have changed color or sheen over time.
When Should You Repaint Instead of Touch Up?
Use touch-up paint for small, isolated marks when the existing finish is still in good condition. Repaint when damage is widespread or when touch-ups remain noticeable because of color, sheen, fading, or paint-age differences.